

Scan the Cloud Pairing QR code on the robot, sign in if needed, and add it to your dashboard.
Software
Software
Start dashboard pairing from the Cloud Pairing widget on the robot. You do not need to start an add-robot flow from the web dashboard.
Find Cloud Pairing
On the robot's screen, locate the Cloud Pairing or Pair Robot widget.
Click Show QR
Click Show QR. The widget updates while the robot creates a one-time pairing code.
Wait for the popup
Wait for the Cloud Pairing popup with the QR code and countdown timer.
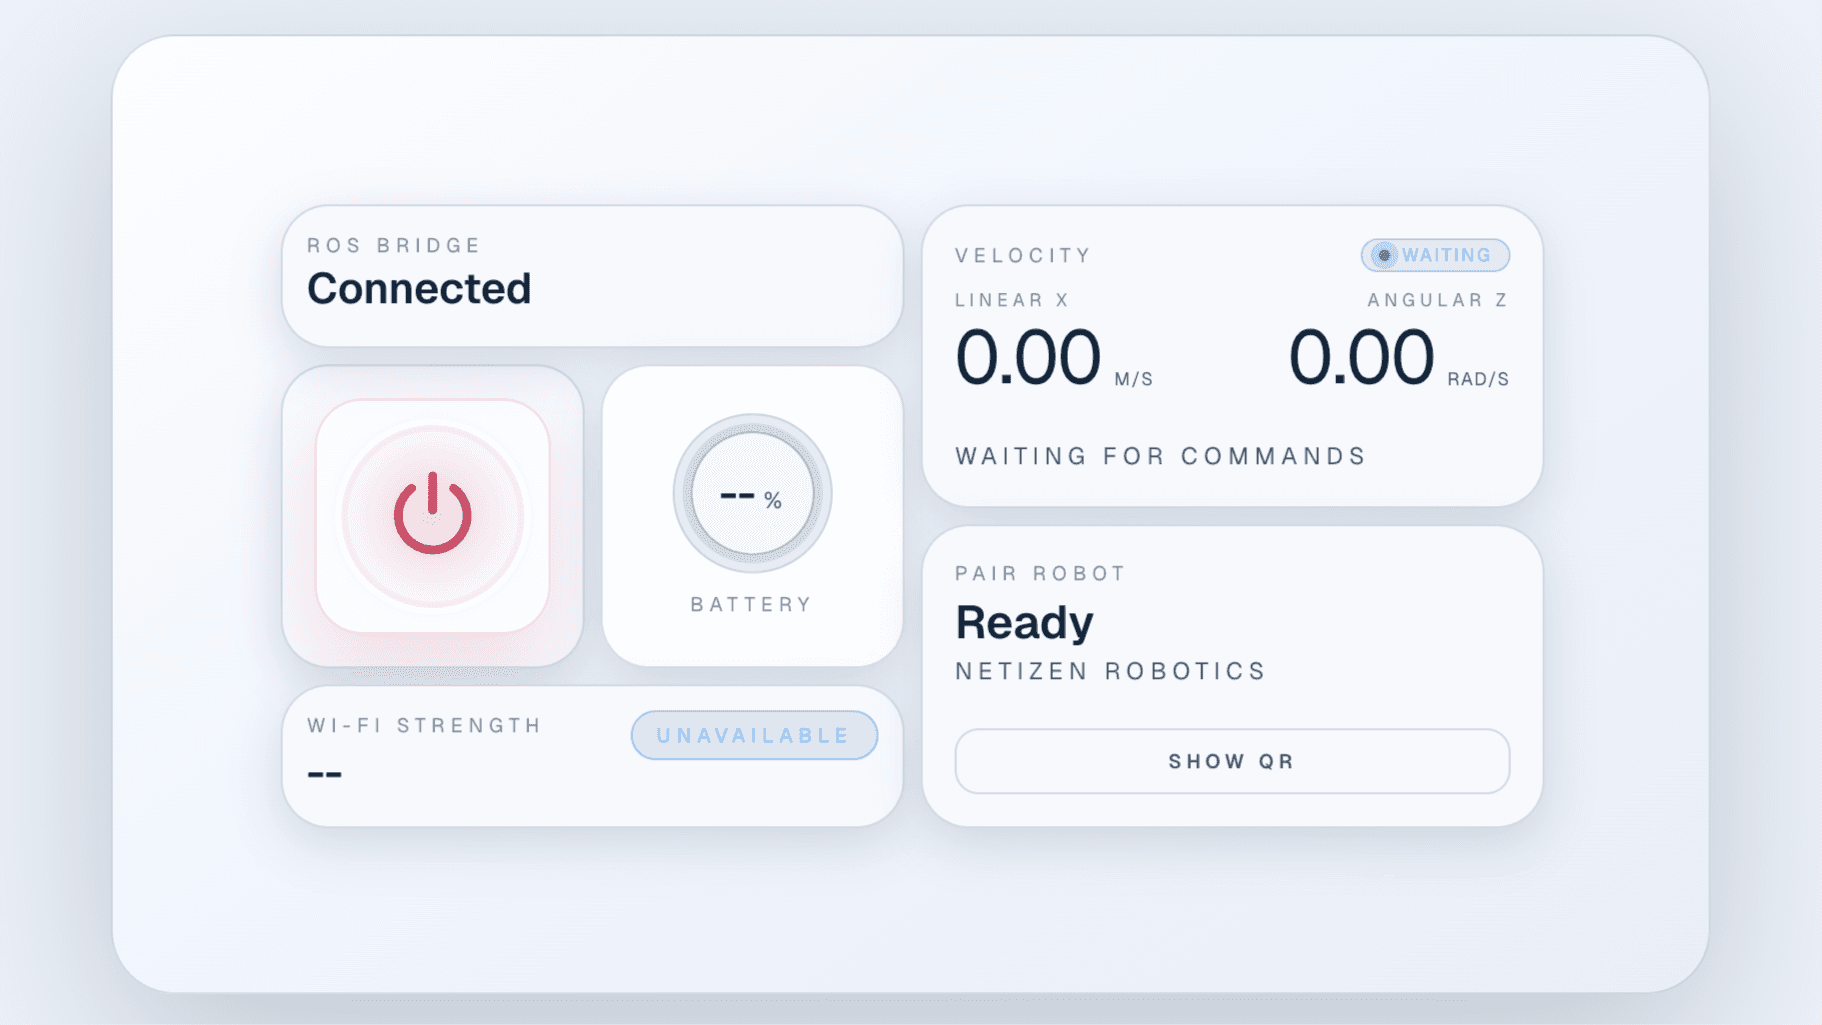
Cloud Pairing Widget
Click Show QR from the Cloud Pairing widget on the robot's screen.
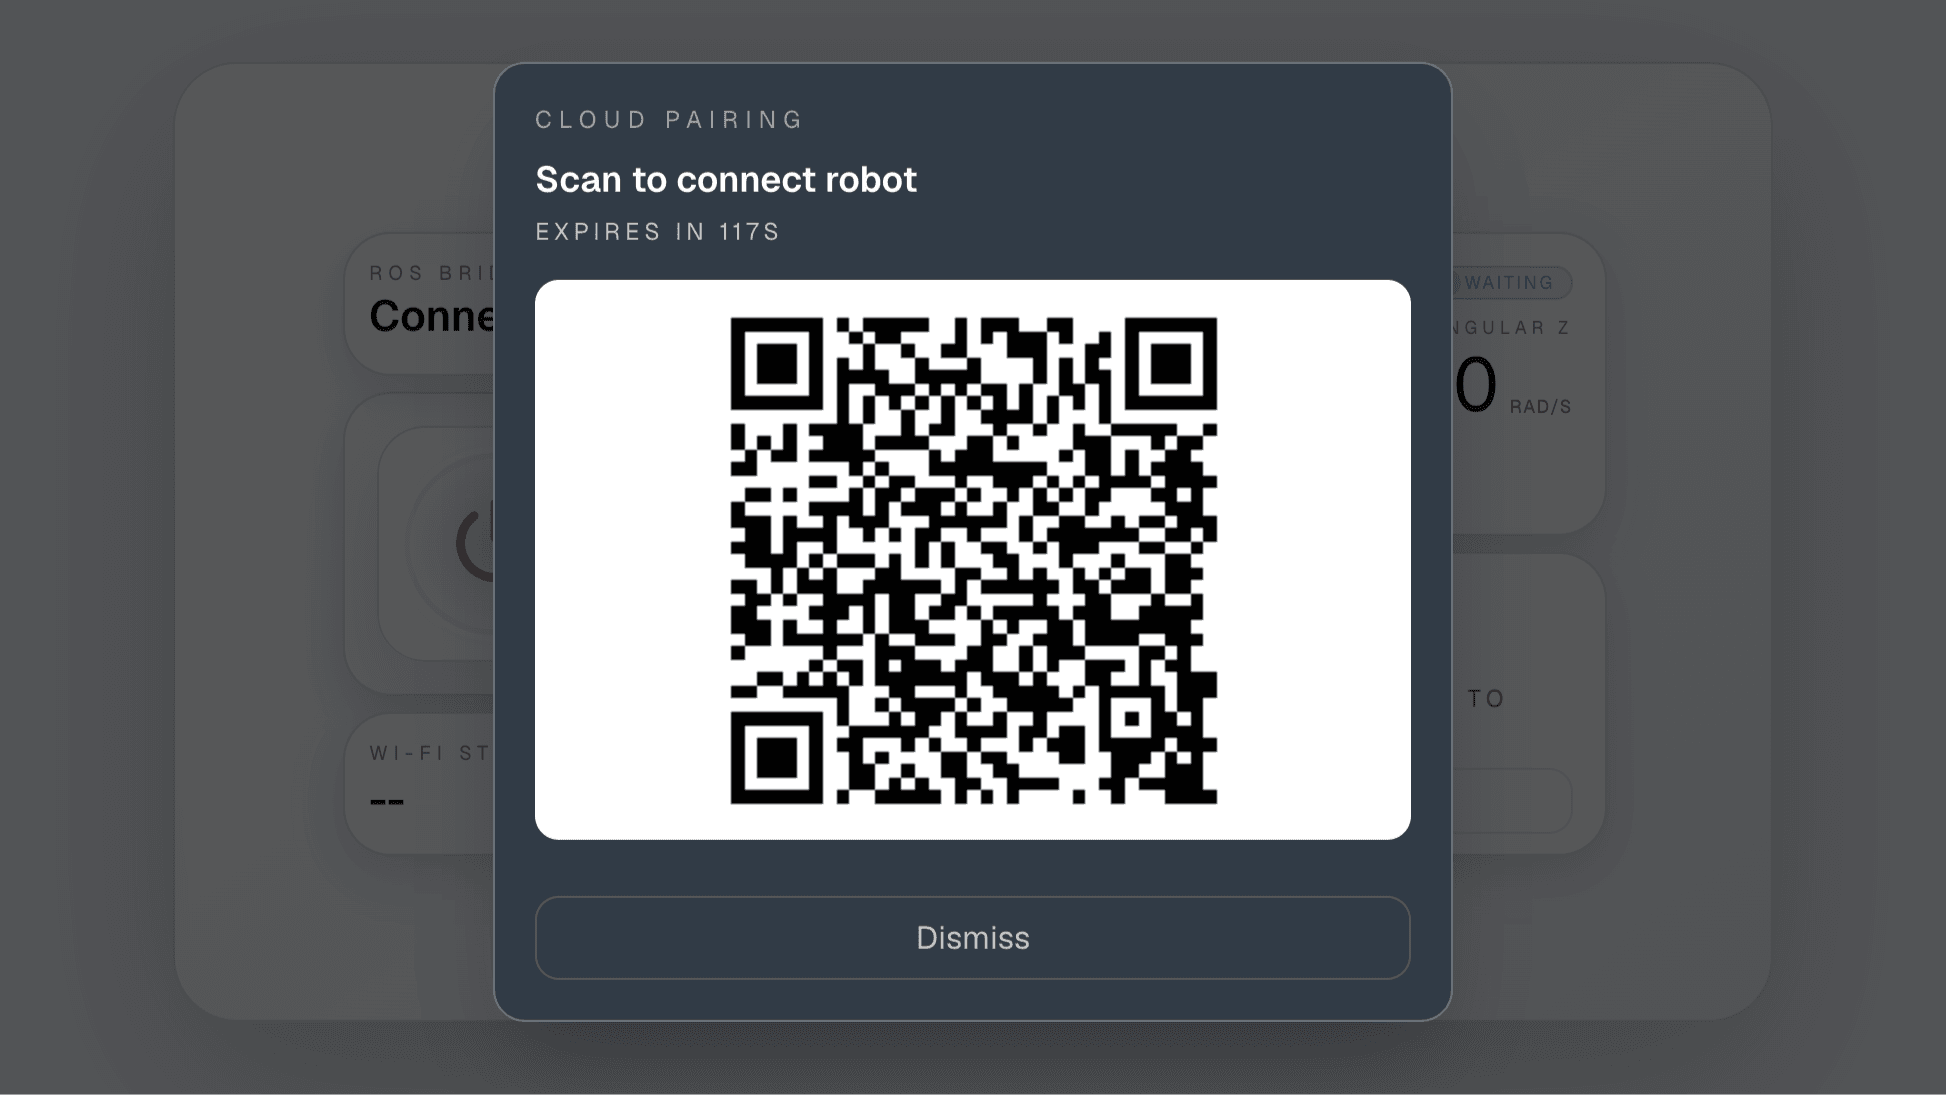
Cloud Pairing QR Popup
The popup presents the scan area and countdown timer. The documentation screenshot uses a sample QR.
Software
Scan the QR code
Use your phone or tablet camera to scan the QR code in the Cloud Pairing popup.
Continue in the browser
Open the scanned link in the browser. It takes you to the Netizen Robotics pairing page.
Sign in if prompted
If you are already signed in, the robot is added to your dashboard. If not, sign in and continue from the redirect.
Pair with the Right Account
The robot is added to the dashboard account that completes the QR link. If another account should own it, use that account before scanning.
Software
After pairing completes, open /dashboard. The robot should appear in the robot list for the account that completed the QR flow.
Open the dashboard
Go to /dashboard in the Netizen Robotics web app.
Find the robot
Confirm that a robot card appears in the dashboard robot list.
Open the robot
Click the robot card to continue monitoring and controlling the robot.
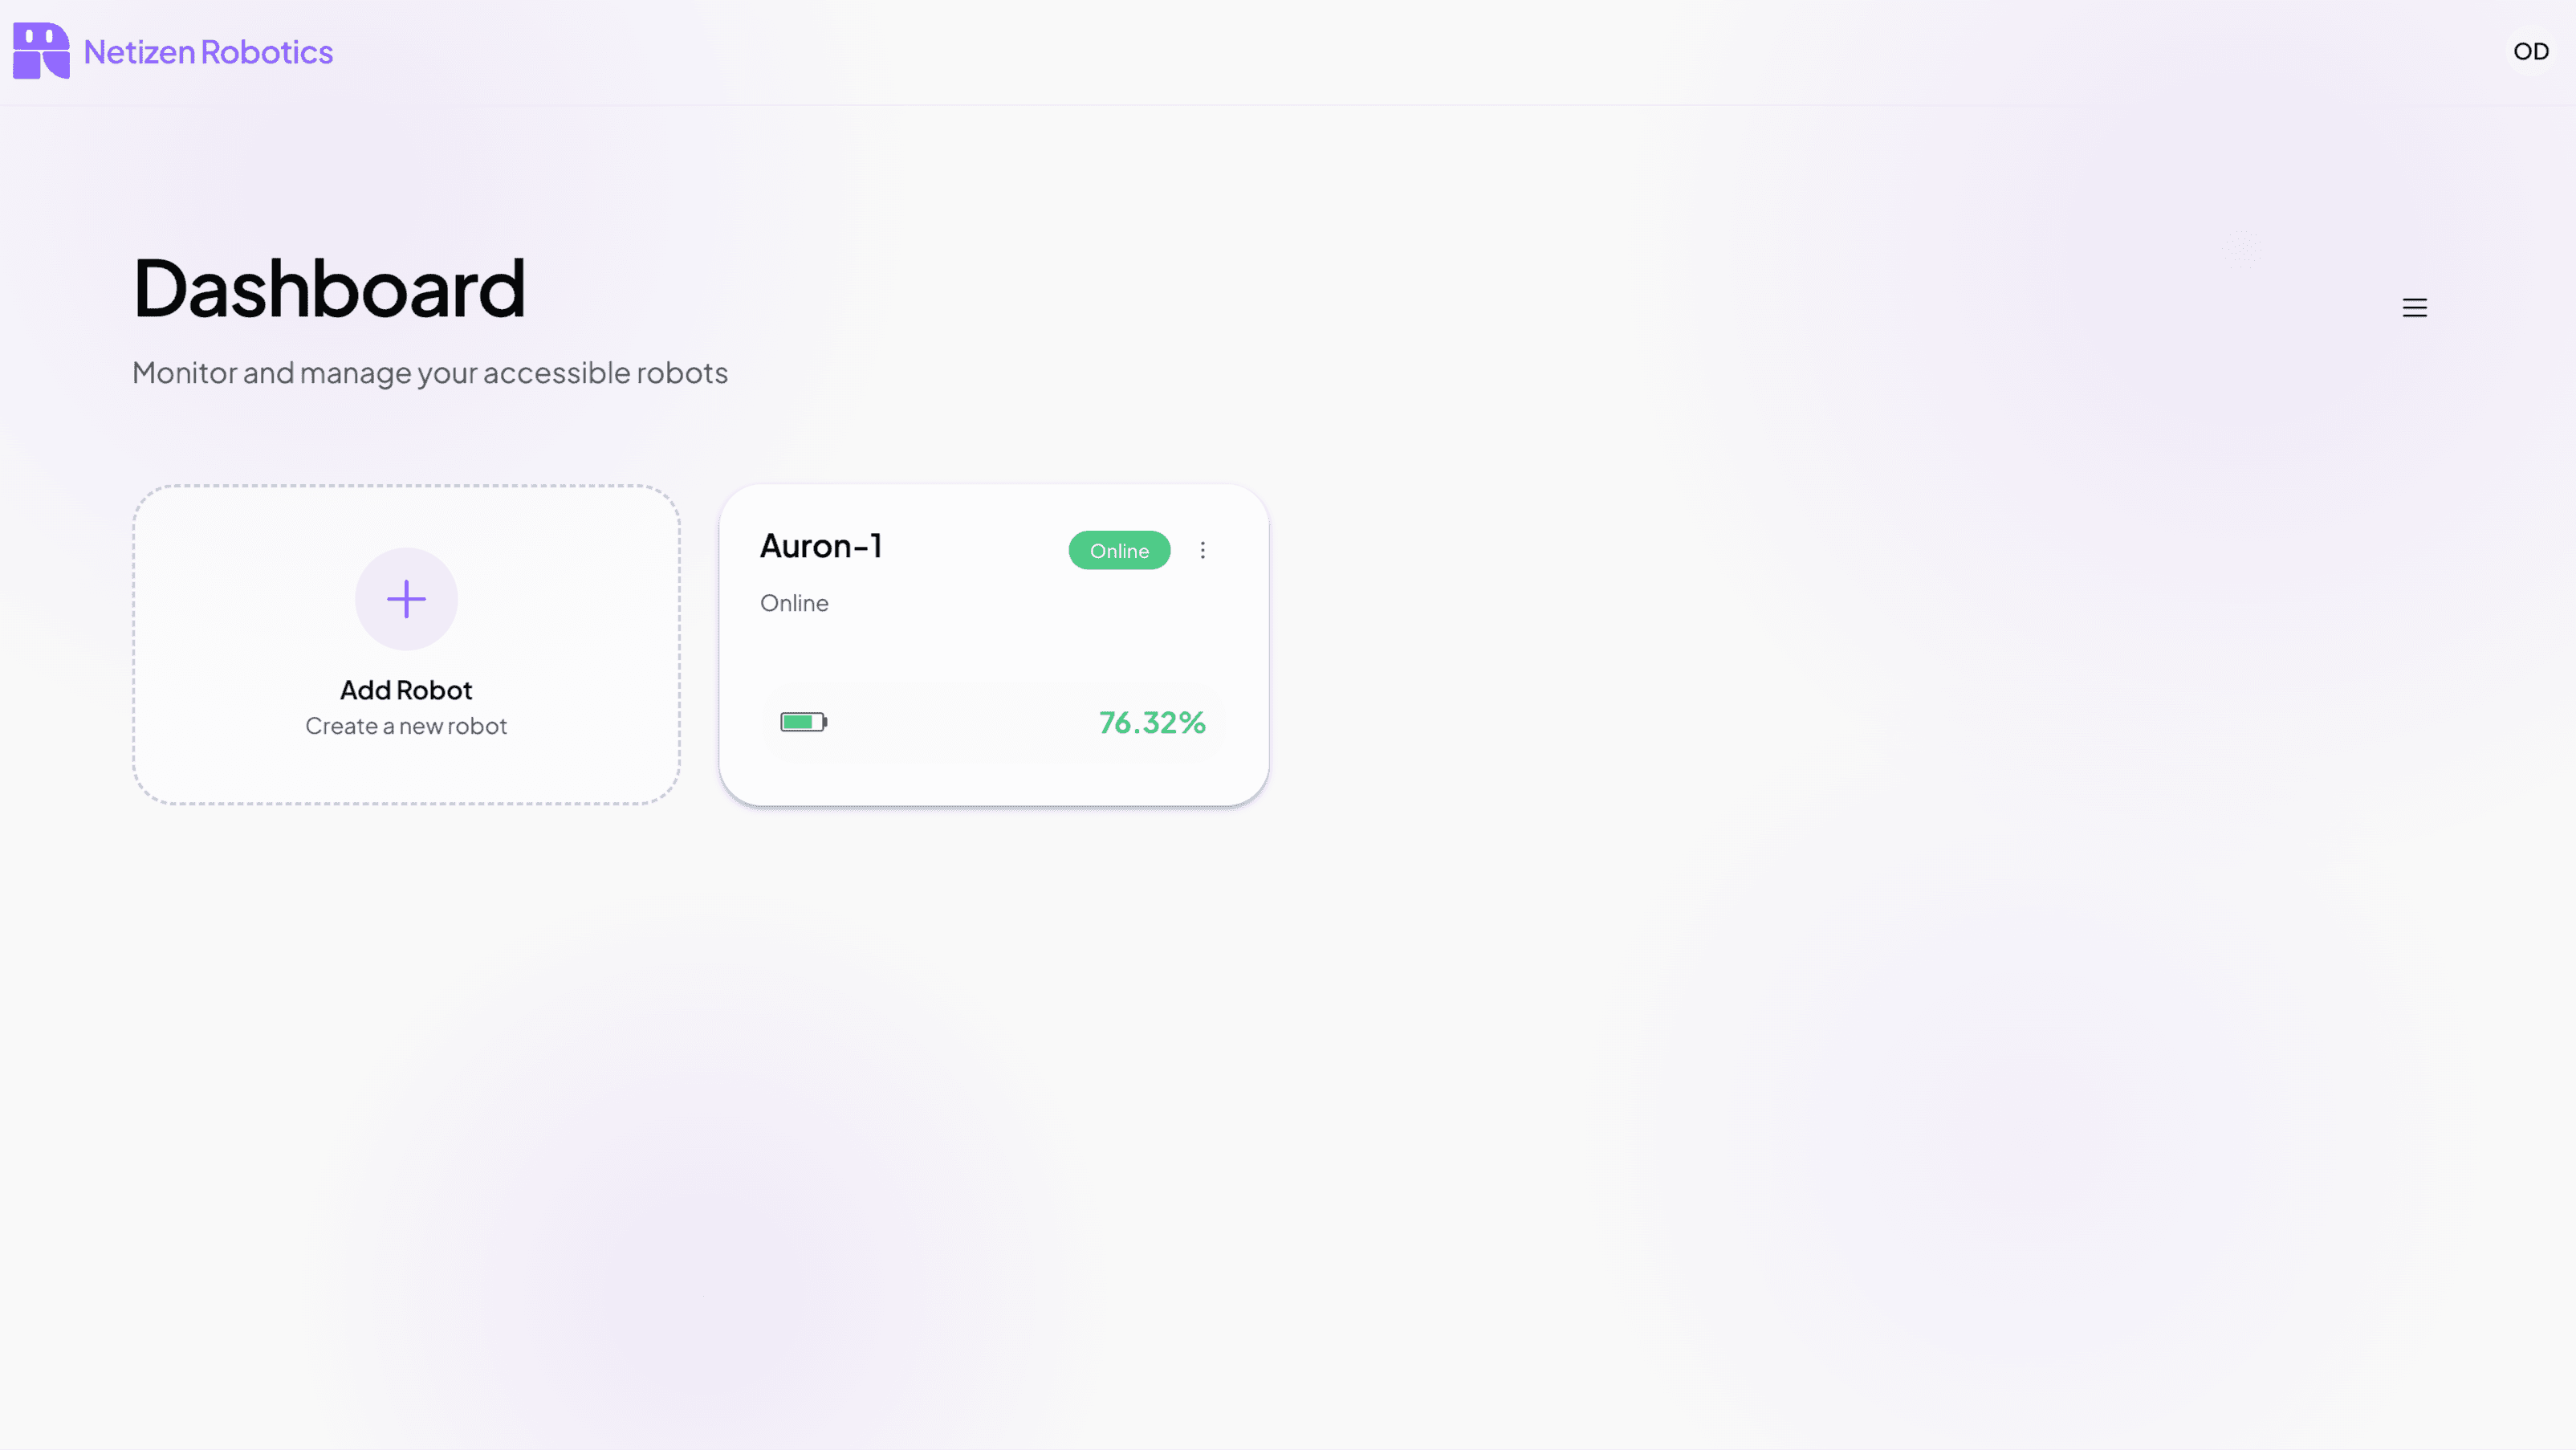
Robot Added to Dashboard
After pairing completes, the robot appears as a card on /dashboard.
Software
Pair Once
The QR code expires after about 120 seconds. If it expires, click Show QR again on the robot. After pairing succeeds, use the dashboard robot list for future access unless you need to re-pair the robot.